|
<< Click to Display Table of Contents >> Work Order Parts |
  
|
|
<< Click to Display Table of Contents >> Work Order Parts |
|
When adding parts, if they're in your Parts List (Inventory), you can simply click on the Add Parts from List and select the items by name or category/name. This makes it very simple to add parts. Remember that list parts do not need to be actual 'inventory'. However, the software will track these items anyway, adjusting their quantities as they get added to the WIP, or when completed. It will simply go negative if you are not tracking and re-ordering items.
If you just want to type them in to this one work order, click on the Add Parts. These items will not be tracked in your inventory. Nor will you be able to select them again for future use. It might be easier in the long run to use the Add Parts from Parts List because you can add to the actual inventory from that button, then you'll be able to re-select that part again in another RO.
Your parts browse listing will look like this:

Parts can be edited by just double clicking on the part. It is recommended that when you've added from the parts list (inventory), you only edit the quantity field. If you want to add a part that is not from your parts list, just click on Add Parts.
Note: The check marks indicate whether or not the part came from your inventory or you just added it on the fly. If it came from your inventory (parts list), then your inventory quantities will get adjusted. If it is a WIP, the On hold gets adjusted with the quantity. If it is an estimate, the parts in inventory do not get affected (until it gets transferred to a WIP).
Although you can add parts without a category, it is recommended that you add a category from your category list. This will help with reporting and other functions later.
![]() (Try right clicking on this and see what happens!)
(Try right clicking on this and see what happens!)
And here's another way to add parts... you must have your parts in inventory in order for this to work.

It's very simple, you can either type, or scan in your part with a barcode scanner. If you want the program to ask you for a quantity, check the quantity check mark, and you will get this screen:
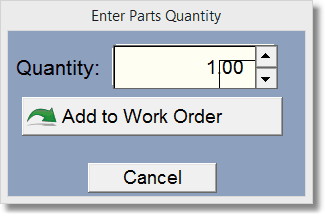 Simply type in the quantity and press enter or click Add to Work Order. If you don't have the quantity checked, the item will be instantly added to the work order. This makes it great if you have a lot of parts to add to the work order.
Note: Although you can use edit in Place, you will probably find the normal editing screen easier to use as you can see everything at once. Edit in place was mostly meant for those who are just building an order for printing, and not really tracking things too much.
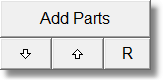
Notice the icons listed under Inv Item / Order Number
![]()
Inv Item either has a checkmark or a blank checkbox. If there is a checkmark, it indicates the item came from the parts List (otherwise known as the inventory list). This lets you know that the item will be tracked in inventory.. or not.
The icons in the 2nd row have to do with the purchase order. If you use the drag & drop to add a part to a PO, the icons will change.
Normally the icon is the white dot icon. However, if you place the item on order (by using the drag & drop to the PO), the icon will change to red, indicating the item has been put on the purchase order. (It is in the PO, but it may or may not have actually been ordered).
Once the item is received in the PO (if it was placed on order through the RO), the icon will change to Green, indicating the item has been received. If the quantity of items received is less than the quantity ordered, the yellow icon will display.
When you add parts to the RO, they are assigned an order number. This is the order they are displayed both on the screen, and on the resulting invoice printout. The order number is at the top of the parts editing form, and you can see it if you scroll to the right on the parts browse.
You can click on a part, then click Add part, or Add part from parts list, and the new part be added right after the part you were on. You'll notice the order number is 5 more than the one before. If you re-number (by clicking on the R button), all the parts get renumbered in increments of 10. You can move a part up or down in the list by clicking on it, then click on the up or down arrow. If you right click on the R button, the program will ask you to sort by Vendor, Category, Technician, Parts, Description, or None. There is no "Undo", but you can always re-sort it, or move the parts up or down.
Tricks and Tips
If you want to delete all items in the above parts list, hold the Shift key on the keyboard and click on the Delete Button. A question will display asking if you would like to delete all of the parts.
You can drag a part and drop it on the delete button to delete it.
You can drag a part and drop it on the change button to edit it.
You can drag a non-inventory part and drop it on the Add Parts from Parts List button to add it to the inventory.
Right Click on the ![]() to open the parts screen wider. Right click on it again to make it the normal size. This may help you visually when adding a lot of parts.
to open the parts screen wider. Right click on it again to make it the normal size. This may help you visually when adding a lot of parts.