|
<< Click to Display Table of Contents >> View History |
  
|
|
<< Click to Display Table of Contents >> View History |
|
This screen can be accessed by clicking on the $ icon from the first screen of Digital Wrench.

Here is the YouTube Video:
All ROs for One Customer
When you first enter this screen, click on the 'Find Customer' button or press 'F2' on the keyboard. The customer table will display. Select or add a customer on the customer table.

You can also click on the 'Cash' button. If you have a customer ID that you use for cash (set this up in the company setup area), then that customers ID will automatically be selected along with that cash customer record.
![]()
From this screen you can view all of one customers RO's, and filter them many different ways. Be sure to uncheck the 'Balances only' so you can see all of the RO's. The screen defaults to show RO's with balances only at first.
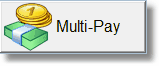
From here you can also add or edit an RO, as well as pay for it. You can also use Multi-Pay to pay many RO's at once. Please be aware that if you use multi-pay, you cannot do a partial payment for any of the RO's.
Filters
This screen is full of various filter options so you can narrow down invoices or RO's. They all work together so you can have a 'Date Filter' and a 'Vehicle Filter' at the same time.

This is fairly obvious. You can select 'All' meaning RO's that are WIPs, Estimates, completed diagnostics, Completed only, or (WIPs, Completed,and Diagnostics). The default when you first enter the screen is 'All'.

'Balances Only' is on when you first enter the screen. Turn it off in order to see all Invoices/RO's.
![]()
You can type in the from and to dates, or click on the calendar icon and there is a date selector screen that lets you easily select a date range.
'S' is to filter by the Invoice/RO Start Date, 'D' is for the completed (Done) date, and 'N' is for No date which effectively turns off the date filter.
This little button lets you select one of the customers vehicles (or units if you're using the program for another repair type). To activate the filter, click on the icon then select the unit. Then you must click the checkbox for the filter to be active. You can hover your mouse over the icon later to see what vehicle or unit is currently selected.

At the top of the screen there is a tab on the right. Click on the 'Search' tab. Type something in the search field, then click on 'Parts', 'Labor', or 'Both'. The program will then filter based on RO's or Invoices that have a Part and/or Labor Item that has the search term. Click on the Magnifying Glass icon to do the search after you've typed in something new.
Click on 'None' to disable this search filter.

For a more advanced filter, you can use the query. The Query lets you search RO records by unlimited options. For instance you can search all RO's that have the word 'damage' in the memo. You can use all of the features of a computer language to filter. You will also be able to save your query for later use. Click on the Query button to use.
Click on the middle checkmark to see Invoices/RO's based on your selected query, or you can click on the forward and reverse buttons to select the next record that matches the query. Try it, it doesn't bite and you really can't hurt a thing.

There is a checkbox at the bottom of the screen. If you check it, the totals of the RO's will be displayed. Because totaling slows down the display of the RO's a bit, the check is normally off.
Making Payments

You can complete one invoice at a time by clicking on the Invoice and clicking on the Complete Transaction Button (or pressing F10). This will complete the invoice as usual, and you'll be able to make no payment, a partial payment, or a full payment, just like you would do in the main RO screen.
However, you can also pay multiple invoices at once using the Multi-Pay button.
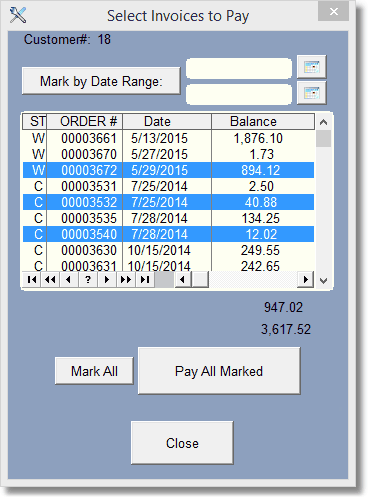
There are several ways to select the invoices to pay. First, you can highlight multiple invoices with the cursor bar by holding the control key down when you click. You can also click on one invoice, then Shift click on another one and all of the invoices will get highlighted.
You can also just mark them by date range. Click the Mark by Date Range button or click on the 2 calendars to select a date range.
You may NOT have partial payments on invoices here... you must pay the amount in full. If you have to pay partial payments on one or more invoices, use the payment button instead. You could pay as much as possible by clicking from the top down until you go over the amount you received, then unmark the bottom one. Then you would take the remaining balance and go pay that invoice with the payment button.
Printing
There are 3 ways to Print data from this screen...
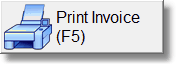
This button is available from the Main RO screen as well. Simply highlight the RO you wish to print and click Print Invoice (or Press F5). The default invoice printout is setup in the company setup area.

This printout does NOT follow the filters, it prints all invoices that have a balance.
Send To gives you many different ways to print or save the data from this screen. SendTo follows all your filters. So if you have many invoices by a date range and maybe a unit/vehicle, then SendTo will only print that information. You can also use the List Formats to re-align the columns so you will see the output from Sendto with that arrangement.
