|
<< Click to Display Table of Contents >> Work Orders and Estimates - All |
  
|
|
<< Click to Display Table of Contents >> Work Orders and Estimates - All |
|
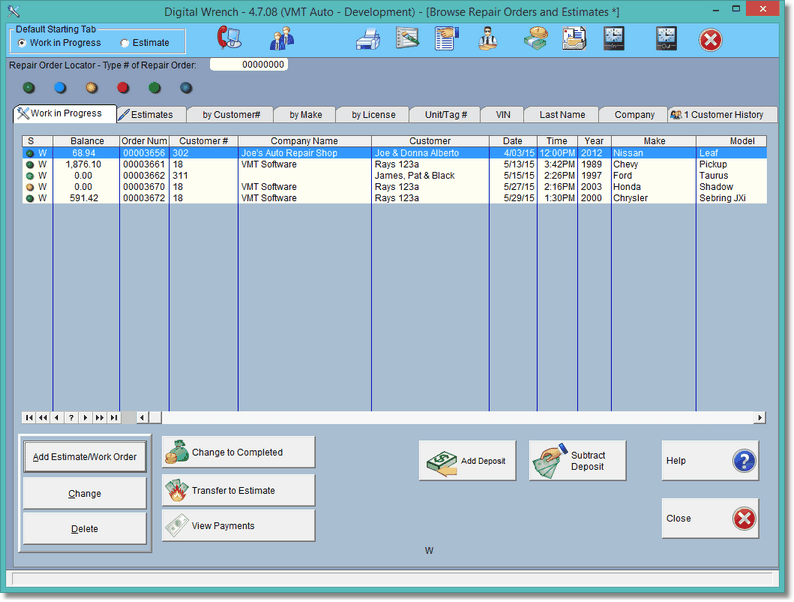
This is the screen that you'll be using most of the day. From here you can create estimates and Works In Progress. The only difference is you must transfer an estimate to a work in progress (WIP) before you can complete the transaction. WIP's work differently, as they put inventory 'on hold', where estimates do nothing to the inventory. Also, in order to complete an invoice, it must be in a WIP
You may want the screen to activate WIP instead of estimates, or the other way around. To do that, simply select the default starting tab.

These are the different tabs. Different items may show up depending on the tab selected.
![]()
For instance, if you select the Work in Progress tab, only the W's show up, and at the bottom the 'Change to Completed' and Transfer to Estimate buttons will be displayed. The Estimate Tab will show the E's only (estimates), and the Change Estimate to Work in Progress and Transfer Estimate to Diagnostic will be displayed.
The other tabs will display both Estimates and WIP's, except for the One customer tab which will display completed work orders for one customer as well. The One Customer Tab also allows you to clone a work order...

Some Tabs also have a report button available near the top of the screen.


Another thing to note is the Status Indicator Lights.

When you are in a work order, you can select a status light. From this browse screen, if you select a light other than dull green, it will display all WIP's and Estimates with just that status. The status lights are just filters and only have meaning to you. We defined them this way:
Blue - Customer is waiting for an estimate or waiting for work to be done.
Yellow - Parts are on Order for this repair order.
Red - the vehicle is being worked on.
Green - the vehicle is done and ready for pickup.
Dull green just turns off the filter so you see all WIP's and Estimates.
So, Let's go over the Icons on the Work Order Browse Screen:
![]()
Note: Hover with your mouse over the icon to see what it will do! (in the program, not the help file)
From left to right..
You can select the default starting Tab, either Work in Progress or Estimates.
![]() The next Icon allows you to change the customer for the highlighted work order.
The next Icon allows you to change the customer for the highlighted work order.
![]() This is the icon you'll be using quite a bit. This prints the estimate or work in progress report/invoice. You can have a different report for a work in progress or completed work order than the estimate report. Note that the work in progress report is the same as the completed report... this is the invoice you will print for you and your customer.
This is the icon you'll be using quite a bit. This prints the estimate or work in progress report/invoice. You can have a different report for a work in progress or completed work order than the estimate report. Note that the work in progress report is the same as the completed report... this is the invoice you will print for you and your customer.
 This allows you to print a 'to-do' list and the items in your current WIP.
![]() This prints a parts Pull List.
This prints a parts Pull List.
 This icon will print an invoice type of report with details about tech labor logs and totals.
 This will print a profit report for the current highlighted WIP.
 This allows you to send an Email or text to the customer whose work order is highlighted. This is great when the work is completed so you can notify your customer right away (some people prefer texts). You will have to set the preference ahead of time in the customer record.
 These 2 icons let you clock in and out respectively. This is for daily time clocks, not related to the work order.
 This will exit the work order browse screen.
 This button lets you view any payments for the highlighted RO.
To Add a work order or estimate, you need to select either the Work in Progress Tab, or the Estimate Tab, then click on the Add Estimate/Work Order Button.

But wait, before you do this, there are now 2 work order forms that you can use. You can select the kind of work order you prefer by clicking on one of these 2 buttons:
![]()
![]()
The button you select will stay depressed even after you leave the program... for instance if I select Simplified, it will look like this:
![]()
(We're not sure why it's depressed, you'd think it'd be happy, after all, it's the chosen button!)
Actually, it was so depressed we eliminated it. You can turn it back on from the Company screen, but you should really use the new RO form which is now standard. We are no longer programming or supporting the old standard form screen.
Once you've decided to Add a new work order, you will be taken to the customer browse screen where you'll select a customer, or add a customer then select.